

How to Wash Graphic Sweatshirts Without Ruining the Print
Table of Contents
- Why Graphic Sweatshirts Need Special Care
- Step 1: How to Wash Graphic Sweatshirts Correctly
- How to Remove Stains From Graphic Sweatshirts
- Air Drying vs Machine Drying Graphic Sweatshirts
- How to Fix Cracked Screen Print on Hoodie
- Ironing, Steaming, and Storage Best Practices
- Keep Your Graphic Sweatshirts Looking New
- Frequently Asked Questions
Last Updated: September 5, 2026
Why Graphic Sweatshirts Need Special Care
A graphic sweatshirt is more than a layer of warmth; it is a statement of identity. At Respect My Tshirt, we design premium apparel meant to last, and we know the difference between a shirt that fades in a month and one that looks sharp for years comes down to how you wash graphic sweatshirts.
The core problem is mechanical agitation, heat, and harsh chemicals, which attack the bond between the screen-printed design and the fabric. Standard washing habits, which work fine for plain cotton tees, can cause print cracking, peeling, and fading prematurely. The care label is just the starting point; the real preservation strategy requires a specific method.
Garment care for printed apparel is about controlling the environment inside your washing machine. By managing water temperature, detergent choice, and the cycle's spin speed, you directly influence the lifespan of your design.
Step 1: How to Wash Graphic Sweatshirts Correctly
The correct method is a cold water, gentle cycle wash with the garment turned inside out. This minimizes friction on the print surface and reduces the risk of heat damage.
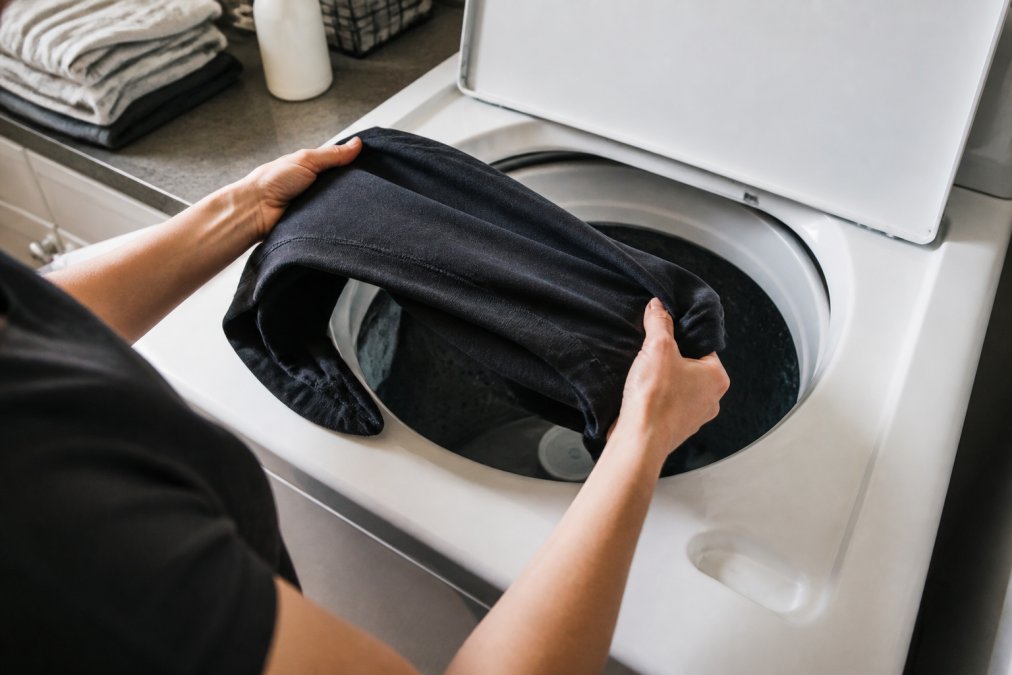
Turn Your Sweatshirt Inside Out
This is the single most effective step you can take. Turning the garment inside out hides the graphic from the direct abrasion of the drum and other clothes, and protects the print from snagging on zippers or buttons.
Pick the Right Water Temperature
Cold water is the default choice for graphic apparel. Warm or hot water can weaken the adhesive in the print and cause the fibers in a cotton blend to shrink (peer-reviewed research). Cold water cycles lift everyday dirt and sweat without the thermal stress that leads to cracking. Reserve warm water only for heavily soiled garments.
Choose a Gentle Detergent
A mild detergent formulated for delicates is the safest option. Harsh detergents contain brighteners and enzymes that can dull the colors of your graphic. Avoid fabric softeners, as they can leave a residue that dulls the print's finish over time. Stick to a bleach-free, gentle liquid detergent.
How to Remove Stains From Graphic Sweatshirts
Stain removal on a graphic area requires a targeted approach, because scrubbing the print directly will accelerate cracking. Never rub the stained area forcefully. Blot the stain gently with a clean, damp cloth and a small amount of mild detergent, working from the outside of the stain inward.
For tougher spots like coffee or food, pre-treat the area before washing. Apply a small drop of gentle detergent directly to the stain and let it sit for five minutes. Then, turn the garment inside out and launder it as usual. For oil-based stains, a dab of dish soap can break down the grease without harming the print, but always test on an inconspicuous seam first.
The key is patience. Avoid hot water, which can set a stain permanently, and avoid chlorine bleach at all costs, as it will strip the color from both the fabric and the design.
Air Drying vs Machine Drying Graphic Sweatshirts
Air drying is the clear winner for preserving graphic sweatshirts. The heat from a tumble dryer is the primary cause of print cracking and shrinkage in a cotton blend (aatcc.org). High heat makes the plastic film of the print brittle and can cause it to separate from the fabric. If you must use a dryer, select the lowest heat setting possible and remove the garment while it is still slightly damp.
But the real enemy of a wet sweatshirt is gravity. Most guides tell you to 'hang to dry' without mentioning that a waterlogged hoodie can stretch several inches at the shoulders and hem before it dries. The weight of the water pulls the knit loops apart, and once elongated, they do not bounce back.
Drying Rack vs. Flat Drying: Which One Prevents Stretching?
A standard folding drying rack is fine for a lightweight crewneck sweatshirt (under 12 oz). Drape the garment evenly over the rungs, with the body centered so one side does not pull heavier than the other. Flip it once halfway through drying so the inside facing the rungs gets airflow.
For a heavy hoodie (14 oz or more, or any fleece-backed style), flat drying is the safer choice. Lay a clean, dry towel on a flat surface, place the sweatshirt on top, and smooth out the fabric with your hands. Reshape the ribbed cuffs and hem while it is still damp. Flip the whole thing over after a few hours so the back dries too.
The Clothespin Problem
If you are drying on a line, do not clip the sweatshirt by the shoulders or the bottom hem. Clothespins leave pinch marks in the knit that are difficult to remove. Instead, fold the sweatshirt over the line at the waistband so the weight is distributed evenly, and use clothespins only on the folded layer of fabric.
How to Tell When It Is Fully Dry
The print side will feel dry to the touch before the inside of the fabric is actually dry, especially on fleece-backed sweatshirts. Check the inside seams and the underarm area. If any part feels cool or damp, give it more time. Putting a slightly damp sweatshirt into a drawer or closet invites mildew and can cause the print to stick to itself.
| Drying Method | Best For | Key Benefit | Risk Level |
|---|---|---|---|
| Flat Drying on a Towel | Heavy hoodies, fleece-backed styles | Prevents stretching and hanger bumps | Low |
| Drying Rack | Lightweight crewnecks | Good airflow, faster dry time | Low (if draped evenly) |
| Line Drying (folded over) | Warm, breezy days | No electricity use | Medium (sun fading risk) |
| Tumble Dry Low | Quick drying needs | Convenience | Medium (still risks shrinkage) |
| Tumble Dry High | Avoid | Speed | High (cracking and shrinkage) |
Why You Should Never Wring or Twist
To speed up drying, some people wring out the excess water. Do not do this with a graphic sweatshirt. Twisting the wet fabric torques the fibers and can crack the print along the fold lines. Instead, press the garment between two clean towels to absorb the bulk of the water before laying it out to dry.
How to Fix Cracked Screen Print on Hoodie
Once the print has cracked, you cannot fully restore it to its original factory state, but you can stabilize it and prevent further damage. The first step is to stop machine washing the garment. Hand washing in cold water is now the only safe method to prevent large pieces of the design from flaking off.
To manage the existing cracking, you can use a heat press or an iron with a protective sheet. Place a piece of parchment paper over the graphic and apply medium heat for a few seconds. This can re-adhere loose edges of the print back to the fabric. The goal is to smooth the cracked pieces down, not to melt the design, so keep the iron moving and avoid steam.
This repair is a temporary fix. It will buy you more time, but the structural integrity of the print is compromised. When the cracking becomes too severe, it might be time to retire the sweatshirt from daily wear and save it for lounging at home.
Ironing, Steaming, and Storage Best Practices
Most graphic sweatshirts do not need ironing if they are dried properly on a rack. But wrinkles happen, especially around the cuffs and hem after a wash. The challenge is removing those wrinkles without melting the print or leaving a shiny mark on the fabric.
Steaming: The Safest First Choice
A handheld steamer is the best tool for graphic sweatshirts because it never touches the print surface. Hang the sweatshirt on a padded hanger and run the steamer from top to bottom, keeping the nozzle about 2 inches away from the fabric. The steam relaxes the cotton fibers and releases wrinkles without any pressure on the design. For the graphic area, hold the steamer at a slight angle so the steam hits the print indirectly. Do not let the steam nozzle get close enough to drip water onto the print, as hot water can soften the adhesive underneath.
Ironing: The Rules If You Must
The only safe way to iron a graphic sweatshirt is to iron the inside of the garment, never the outside. Turn the sweatshirt inside out and lay it on the ironing board. Set the iron to the 'cotton' setting (around 300°F to 350°F) but do not use the steam burst function. Iron the back of the print area with smooth, even strokes. The heat will transfer through the fabric and relax wrinkles on the front without the hot plate ever touching the design.
If a wrinkle on the front of the print is unavoidable and you need to address it directly, you must use a barrier. Place a piece of parchment paper or a clean cotton pressing cloth over the graphic. Set the iron to a medium-low heat (around 250°F) and press down for no more than 3 seconds at a time. Lift the iron between presses. Do not slide the iron back and forth, as the friction can pull at the edges of the print.
Storage: Folding vs. Hanging
Storage is where most graphic sweatshirts get damaged without anyone noticing until it is too late. The rule of thumb is: fold heavy sweatshirts, hang light ones.
Fold these:
- Heavy hoodies (14 oz or more)
- Fleece-backed sweatshirts
- Any garment with a large, full-front print
Folding prevents the weight of the fabric from pulling down on the shoulders and neckline. When you fold, place a piece of acid-free tissue paper between the front and back of the sweatshirt if you are stacking multiple printed garments. This prevents the prints from rubbing against each other and creating micro-cracks over time.
Hang these (with caution):
- Lightweight crewnecks (under 12 oz)
- Sweatshirts with small prints on the chest only
If you hang, use a wide, padded hanger. A thin wire or plastic hanger will create bumps in the shoulders. Hang the sweatshirt by the shoulder seams, not by the neckline.
The Print-to-Print Problem
When you stack folded graphic sweatshirts in a drawer, the prints face each other. Over weeks of pressure, the plastic film on one print can adhere to the fabric of the one next to it, especially in warm environments. This is called print blocking, and it can cause the design to peel when you pull the garments apart. The fix is simple: alternate the direction of the folds so the prints do not face each other, or place a sheet of tissue paper between layers.
Light and Temperature
Keep your folded sweatshirts out of direct sunlight, which can fade the colors over time. A cool, dry closet is ideal. Avoid storing graphic sweatshirts in attics or garages where temperatures fluctuate. Heat cycles cause the print film to expand and contract, which accelerates cracking. When packing for travel, fold the sweatshirt with the graphic facing inward to protect it from friction against other items, and do not pack it at the bottom of a heavy suitcase where it will be compressed under weight.
Keep Your Graphic Sweatshirts Looking New
Following this care routine will keep the bold designs on your favorite apparel looking sharp. It comes down to a few consistent habits: always wash inside out in cold water, use a mild detergent, and let the garment air dry. This approach is the industry standard for textile preservation, and it is the method we recommend for all the premium hoodies and sweatshirts in our collection at Respect My Tshirt.

The effort is minimal, but the payoff is significant. A well-cared-for sweatshirt maintains its fit, its color, and its message. Whether you are wearing a zodiac piece that reflects your personality or a graduation design celebrating an achievement, you want it to represent you well for years.
We know that buying a new graphic sweatshirt is an investment in self-expression. Our apparel is designed with durable materials and high-quality prints, but even the best construction needs proper care. By adopting these simple habits, you protect your style and get the most out of every piece you own. Get started with Respect My Tshirt and find a design that is worth protecting, then keep it looking new with the care it deserves.
Frequently Asked Questions
Should graphic sweatshirts be washed inside out?
Yes, always turn your sweatshirt inside out before washing. This protects the printed design from rubbing against other clothes and the drum of the washing machine. Direct friction is the main cause of print cracking and fading. Flipping the garment inside out also keeps zippers and rough fabrics from snagging the graphic. Make it a habit every time you wash graphic sweatshirts.
Is OxiClean safe for graphic sweatshirts?
Oxygen-based bleach like OxiClean is generally safe for colors, but test it on an inside seam first. Never pour the powder directly onto the printed area, as the granules can be abrasive and cause micro-scratches. Dissolve it fully in water before adding your sweatshirt. For stubborn stains on the graphic itself, spot-treat with a mild detergent instead and gently blot the area.
Can you put graphic sweatshirts in the dryer?
You can, but only on the lowest heat setting and for a short time. High heat is the biggest cause of print cracking and shrinkage of the cotton blend fabric. The safest option is air drying: lay the sweatshirt flat on a clean towel or use a drying rack. If you use a dryer, remove the sweatshirt while it is still slightly damp and let it finish drying flat to prevent heat damage.
What temperature water is best for printed apparel?
Cold water is the best choice for washing graphic sweatshirts. Water temperatures of 60°F to 80°F help preserve the integrity of the screen print or DTF transfer and prevent colors from bleeding. Cold water also prevents shrinkage of cotton blends. Reserve warm water for heavily soiled sweatshirts, but never use hot water, as it will weaken the adhesive and cause the print to crack or peel.
This article was written using GrandRanker